Learning Rust - Part 1
Introduction
I have been a professional developer for almost 20 years, and like many professional developers I have used many programming languages in my career (C, C++, Fortran, Java, Scala, JavaScript, TypeScript, Python, Go, etc.).
It’s been a while now that I wanted to learn Rust and also to write a article on Medium so I decided to do both at the same time.
Although it is not my mother tongue, I wrote this article in English. Maybe there will be some mistakes or some weird turns of phrase, please be kind to me but do not hesitate to correct me, I’m only asking for improvement :).
In this article, I describe how to create a complete Rust development environment, usable from a browser and contained in a docker image. We are also going to write our first program and learn how to use the debugger.
For those who are very impatient, the link to the github repository is given in the conclusion.
Create a portable development environment
To begin we are going to create a Dockerfile containing all the necessary tools to program in Rust. This is how this Dockerfile looks like:
FROM ubuntu:20.04

# Upgrade and install curl, sudo and essential development tools
RUN apt update -y && apt upgrade -y && \
    apt install -y curl git sudo build-essential lldb

# Add a user `rustdev` so that you're not developing as the `root` user
# The user needs to sudoer be able to install code-server
RUN adduser --gecos '/usr/bin/bash' --disabled-password rustdev && \
  echo "rustdev ALL=(ALL) NOPASSWD:ALL" >> /etc/sudoers.d/nopasswd
ENV SHELL bash

USER rustdev
WORKDIR /home/rustdev
# Create USER environment variable to prevent "could not determine the current user, please set $USER" error when running "cargo new ..."
ENV USER rustdev

# Install rustup
RUN curl --proto '=https' --tlsv1.2 -sSf https://sh.rustup.rs > rustup.sh
RUN sh rustup.sh -y && rm -f rustup.sh
ENV PATH /home/rustdev/.cargo/bin:$PATH

# Install code-server
RUN curl -fsSL https://code-server.dev/install.sh > install.sh
RUN sh install.sh --method=standalone
RUN rm -f install.sh
RUN sudo chown -R rustdev:rustdev /home/rustdev/.local
ENV PATH /home/rustdev/.local/bin:$PATH

# Install code-server extensions

## Install extensions dependencies
RUN rustup component add rust-analysis --toolchain stable-x86_64-unknown-linux-gnu
RUN rustup component add rust-src --toolchain stable-x86_64-unknown-linux-gnu
RUN rustup component add rls --toolchain stable-x86_64-unknown-linux-gnu

## Adds language support for Rust
RUN code-server --install-extension rust-lang.rust

## Alternative Rust Language Server
RUN code-server --install-extension matklad.rust-analyzer
### Download and Install rus-analyzer binary
RUN mkdir -p /home/rustdev/.local/share/code-server/User/globalStorage/matklad.rust-analyzer/
RUN curl -L https://github.com/rust-analyzer/rust-analyzer/releases/latest/download/rust-analyzer-linux -o /home/rustdev/.local/share/code-server/User/globalStorage/matklad.rust-analyzer/rust-analyzer-linux
RUN chmod u+x /home/rustdev/.local/share/code-server/User/globalStorage/matklad.rust-analyzer/rust-analyzer-linux

## Debugging tools
## Install from the vsix instead of using extension id because of this issue: https://github.com/vadimcn/vscode-lldb/issues/314
RUN curl -L https://github.com/vadimcn/vscode-lldb/releases/download/v1.6.0/codelldb-x86_64-linux.vsix -o codelldb-x86_64-linux.vsix
RUN code-server --install-extension codelldb-x86_64-linux.vsix
RUN rm -f codelldb-x86_64-linux.vsix

## Toml extension, usefull to edit cargo configuration files
RUN code-server --install-extension bungcip.better-toml

# Remove sudo package
USER root
ENV SUDO_FORCE_REMOVE yes
RUN apt -y remove sudo

# Run code server
USER rustdev

CMD ["code-server", "--bind-addr=0.0.0.0:8080", "--auth=none"]
Although it’s not extremely complex, it took me longer than I expected to create this Dockerfile and I think it’s interesting that we go through it together.
The first part is very common. I chose ubuntu:20.04 as base image. Indeed ubuntu is widely adopted by the docker community thus it is easy to find support. And the version 20.04 because it is a long term support. The RUN directive installs some necessary system tools:
- Curl to download some installation scripts and packages
- Git because it is used by the Rust build system and package manager: Cargo
- sudo because it is needed to install code-server, a very nice VS Code clone with a web UI
- build-essential: a meta package containing essential building tools
- LLDB: the debugger of the LLVM project
FROM ubuntu:20.04

# Upgrade and install curl, sudo and essential development tools
RUN apt update -y && apt upgrade -y && \
    apt install -y curl git sudo build-essential lldb
As it is a bad practice to create root containers, Iet’s create a user named rustdev. The default SHELL for this user is bash, the home directory is /home/rustdev , the password is disabled. To be able to install code-server, it is also needed to add rustdev to the sudoer list to allow rustdev to use sudo without password. To be perfectly honest, giving to a user the possibility to run sudo without password is also not a very good practice. This will be fixed later by removing the package sudo. The SHELL environment variable is also set to make bash the default shell.
# Add a user `rustdev` so that you're not developing as the `root` user
# The user needs to sudoer be able to install code-server
RUN adduser --gecos '/usr/bin/bash' --disabled-password rustdev && \
  echo "rustdev ALL=(ALL) NOPASSWD:ALL" >> /etc/sudoers.d/nopasswd
ENV SHELL bash
The next section sets the user to be rustdev and the working directory to be /home/rustdev, the home directory of rustdev user. The USER environment variable is defined to be able to use Cargo later. If the USER environment variable is not defined when running cargo new … command in the container, an error is raised: “could not determine the current user, please set $USER”
USER rustdev
WORKDIR /home/rustdev
# Create USER environment variable to prevent "could not determine the current user, please set $USER" error when running "cargo new ..."
ENV USER rustdev
Now its time to install rustup, the Rust toolchain installer. The rustup.sh script installs executables like rustc and cargo in ~/.cargo/bin, that is why it is needed to add /home/rustdev/.cargo/bin to the PATH.
# Install rustup
RUN curl --proto '=https' --tlsv1.2 -sSf https://sh.rustup.rs > rustup.sh
RUN sh rustup.sh -y && rm -f rustup.sh
ENV PATH /home/rustdev/.cargo/bin:$PATH
There is a bit more to say about the installation of code-server. Installing it requires you to be sudoer because the install script installs a deb package. I used standalone method to install code-server because it puts it in the ~/.local directory which allows rustdev user to install extension without sudo. Once the installation is completed, the ~/.local directory is owned by root user. I used the chown command to change the ownership to be rustdev. Finally /home/rustdev/.local/bin is added to the PATH as it contains the code-server executable.
# Install code-server
RUN curl -fsSL https://code-server.dev/install.sh > install.sh
RUN sh install.sh --method=standalone
RUN rm -f install.sh
RUN sudo chown -R rustdev:rustdev /home/rustdev/.local
ENV PATH /home/rustdev/.local/bin:$PATH
Now that code-server is installed, it’s time to add some extensions to make code-server user-friendly with Rust developers. I used rustup to install Rust toolchain components that are necessary for the extensions I needed. If you don’t install these components now, this will be done each time you re-run the container which is not the behavior I expected.
# Install code-server extensions
## Install extensions dependencies
RUN rustup component add rust-analysis --toolchain stable-x86_64-unknown-linux-gnu
RUN rustup component add rust-src --toolchain stable-x86_64-unknown-linux-gnu
RUN rustup component add rls --toolchain stable-x86_64-unknown-linux-gnu
After reading a post by Thiago Massari Guedes, I decided to trust him and to add rust, rust-analyzer and vscode-lldb extensions even if rust-analyzer is in alpha version and that the documentation of rust-analyzer says that it may cause conflicts with the official Rust plugin. We will see in use if Thiago’s recommendations were good, I will make a feedback in the next posts as I progress in the discovery of Rust.
Rust extension is straightforward to install using code-server command line tool, rust-analyzer and vscode-lldb were more problematic.
## Adds language support for Rust
RUN code-server --install-extension rust-lang.rust
My first attempt to install rust-analyzer was to simply run code-server –install-extension matklad.rust-analyzer. The problem is it just installs the extension without downloading the rust-analyzer binary required by the extension. As a consequence, the executable is downloaded each time the container is run, when you try to use the extension for the first time. To prevent this behavior, the rust-analyzer executable can be downloaded directly from github and put in the code-server global storage where the rust-analyzer extension expects to find it.
Unfortunately, even taking these precautions, when the container is run and the extension is activated by opening a first Rust project, the rust-analyzer extension asks for downloading the rust-analyzer binary. I have inspected the code of the rust-analyzer extension to understand the problem. If you are interested, I described this issue in github.
A solution could be to modify the package.json of the extension by removing the version, but it is very dirty so I chose to keep the Dockerfile as is and wait the rust-analyzer team solves the problem as it is non blocking.
## Alternative Rust Language Server
RUN code-server --install-extension matklad.rust-analyzer
## Download and Install rus-analyzer binary
RUN mkdir -p /home/rustdev/.local/share/code-server/User/globalStorage/matklad.rust-analyzer/
RUN curl -L https://github.com/rust-analyzer/rust-analyzer/releases/latest/download/rust-analyzer-linux -o /home/rustdev/.local/share/code-server/User/globalStorage/matklad.rust-analyzer/rust-analyzer-linux
RUN chmod u+x /home/rustdev/.local/share/code-server/User/globalStorage/matklad.rust-analyzer/rust-analyzer-linux
For vscode-lldb extension, I also tried to install it the same way I had installed rust and rust-analyzer extensions but I encountered problems trying to use it. After some research, I found the vscode-lldb issue 314 so I tried the proposed fix which consists in downloading manually from github the vsix extension file and adding it using the code-server command line. It works perfectly.
## Debugging tools
## Install from the vsix instead of using extension id because of this issue: https://github.com/vadimcn/vscode-lldb/issues/314
RUN curl -L https://github.com/vadimcn/vscode-lldb/releases/download/v1.6.0/codelldb-x86_64-linux.vsix -o codelldb-x86_64-linux.vsix
RUN code-server --install-extension codelldb-x86_64-linux.vsix
RUN rm -f codelldb-x86_64-linux.vsix
After that, I ended by installing the better-toml extension useful to edit Cargo toml configuration files.
## Toml extension, usefull to edit cargo configuration files
RUN code-server --install-extension bungcip.better-toml
Now everything is installed, it is time to remove the sudo package that is no more necessary. This can be done only as root user. Once sudo package is removed, the user can be set again to rustdev to run code-server.
# Remove sudo package
USER root
ENV SUDO_FORCE_REMOVE yes
RUN apt -y remove sudo
USER rustdev
To run code-server, we need to overload the binding address and port to be able to access the web UI from the host. Because this container will be used locally, for testing purpose, we can also by-pass authentication mechanisms.
# Command to run code-server
CMD ["code-server", "--bind-addr=0.0.0.0:8080", "--auth=none"]
To test if everything is working correctly, simply use docker build in the directory where the Dockerfile is saved.
docker build -t rustcoder .
Run the docker image
This is how my working repository is organized:
├── docker-compose.yaml
├── docker-image
│   └── Dockerfile
├── projects
- The file docker-compose.yaml is a docker-compose file that defines how to build and run the image.
- The directory docker-image contains the Dockerfile.
- The directory projects is an empty repository.
Note that I use docker version 19.03.8 and docker-compose version 1.27.4, depending on the versions you use, some adjustments could be required.
Knowing that, this is how my docker-compose.yaml looks like:
version: "3.8"
services:
  rustcoder:
    build: ./docker-image
    ports:
    - 8080:8080
    cap_add:
      - SYS_PTRACE
    security_opt:
      - seccomp:unconfined
    volumes:
      - ./projects:/home/rustdev/projects
The file format version is 3.8, which is a version compatible with my version of docker and docker-compose.
version: "3.8"
The file defines only one service, rustcoder.
services:
  rustcoder:
The image of the rustcoder service is built using the Dockerfile in the directory ./docker-image.
build: ./docker-image
The port 8080 of the container is binded to the port 8080 of host.
    ports:
    - 8080:8080
The capability SYS_PTRACE is added because LLDB uses ptrace system calls.
    cap_add:
      - SYS_PTRACE
To allow LLDB working correctly inside the container, the seccomp security profile is set to unconfined which means that the container will be run without the default seccomp profile.
    security_opt:
      - seccomp:unconfined
The host directory ./projects is mounted into the container /home/rustdev/projects directory.
    volumes:
      - ./projects:/home/rustdev/projects
Now the rustcoder service can be run using docker-compose in the directory where the docker-compose.yaml file is saved.
docker-compose up
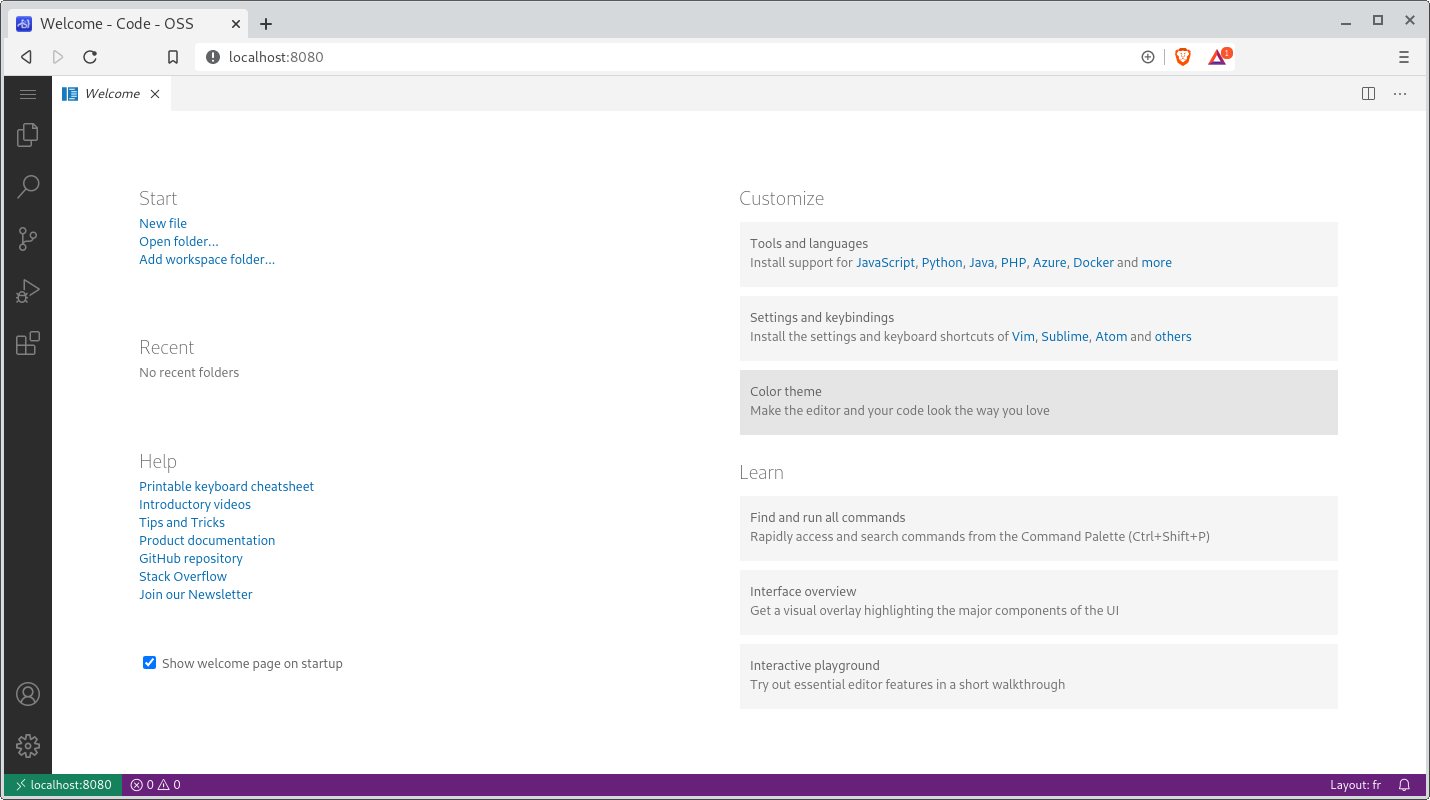
Once done, the Rust development environment is accessible from http://localhost:8080.
Create a project with Cargo
To create a project with Cargo, we need first to open a Terminal inside code-server.
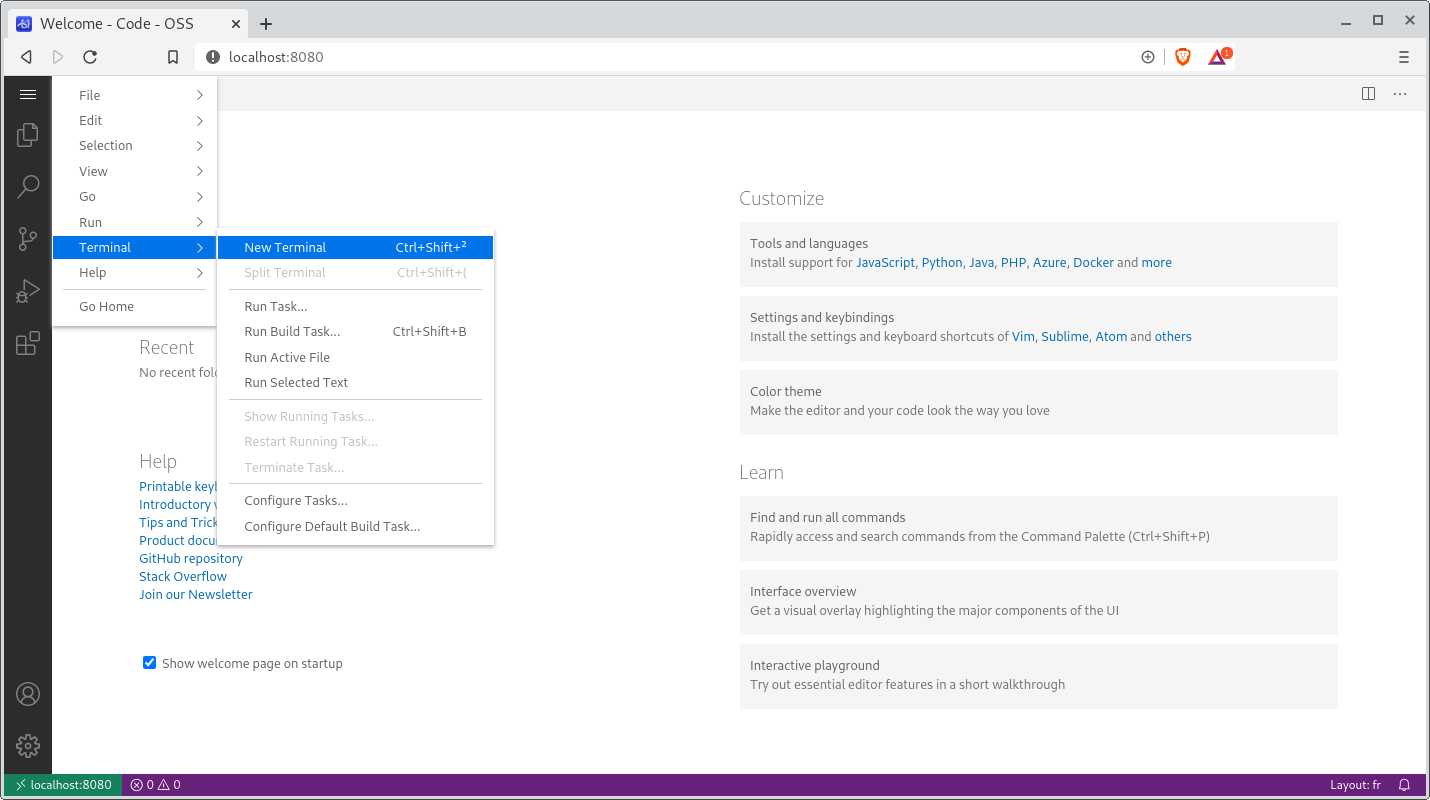
Once the Terminal is opened, go to projects directory and run the following command:
cargo new hello_world
Than click on Open Folder in the welcome screen or from the menu click File > Open Folder and then select /home/rustdev/projects/hello_world.
Due to the “bug” explained before, the rust-analyzer extension should ask you for downloading the rust-analyzer binary.
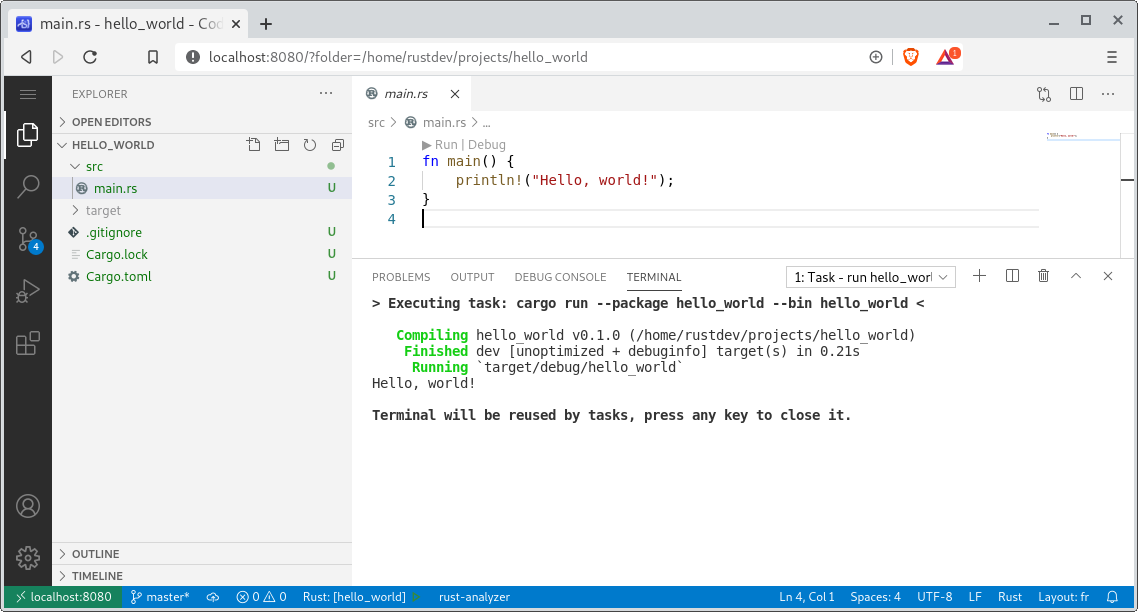
Once done, open the /home/rustdev/projects/hello_world/main.rs file. Now you can run your first Rust program by simply clicking Run above the main function definition.
Debug your program with code-server
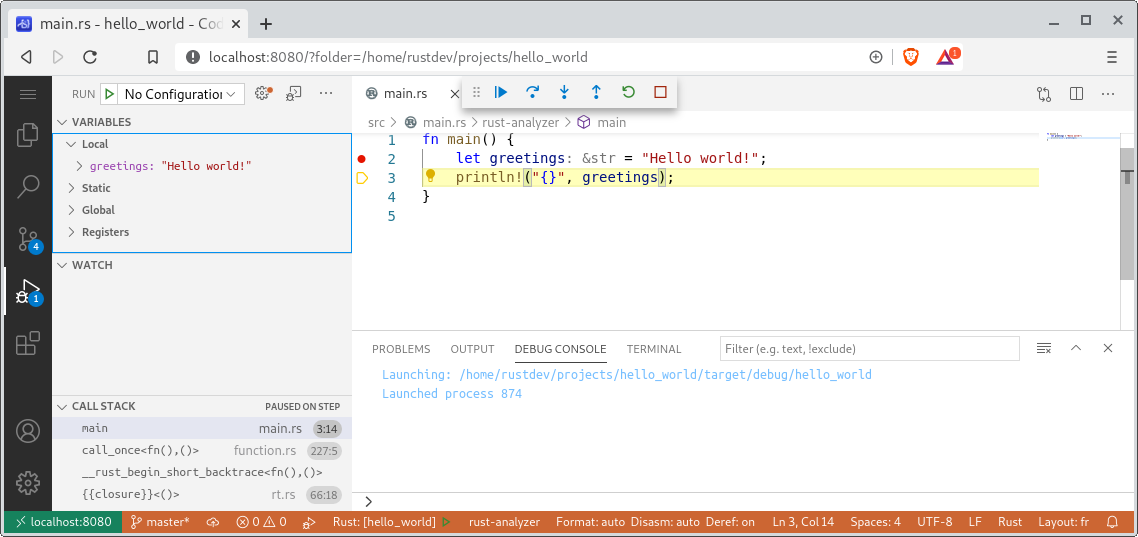
To illustrate how debugging works, let’s modify a little bit the main function by creating a greetings variable and putting a breakpoint by clicking in the margin (the red bullet).
To start the debugging session, click on Debug: code-server automatically opens the debug panel and the execution is stopped to the breakpoint. You can now click on the step over icon (the blue rounded arrow with a point below) that appears in overlay.
Conclusion
We have now a complete Rust development environment and we are ready to start learning Rust :).
The code developed to create the post is available on github under CC0-1.0 License.